Customer segmentation in the system allows to select groups of customers by different parameters.
Possibilities of customer segmentation in the system allows to classify customers:
Read also Features of segment triggers
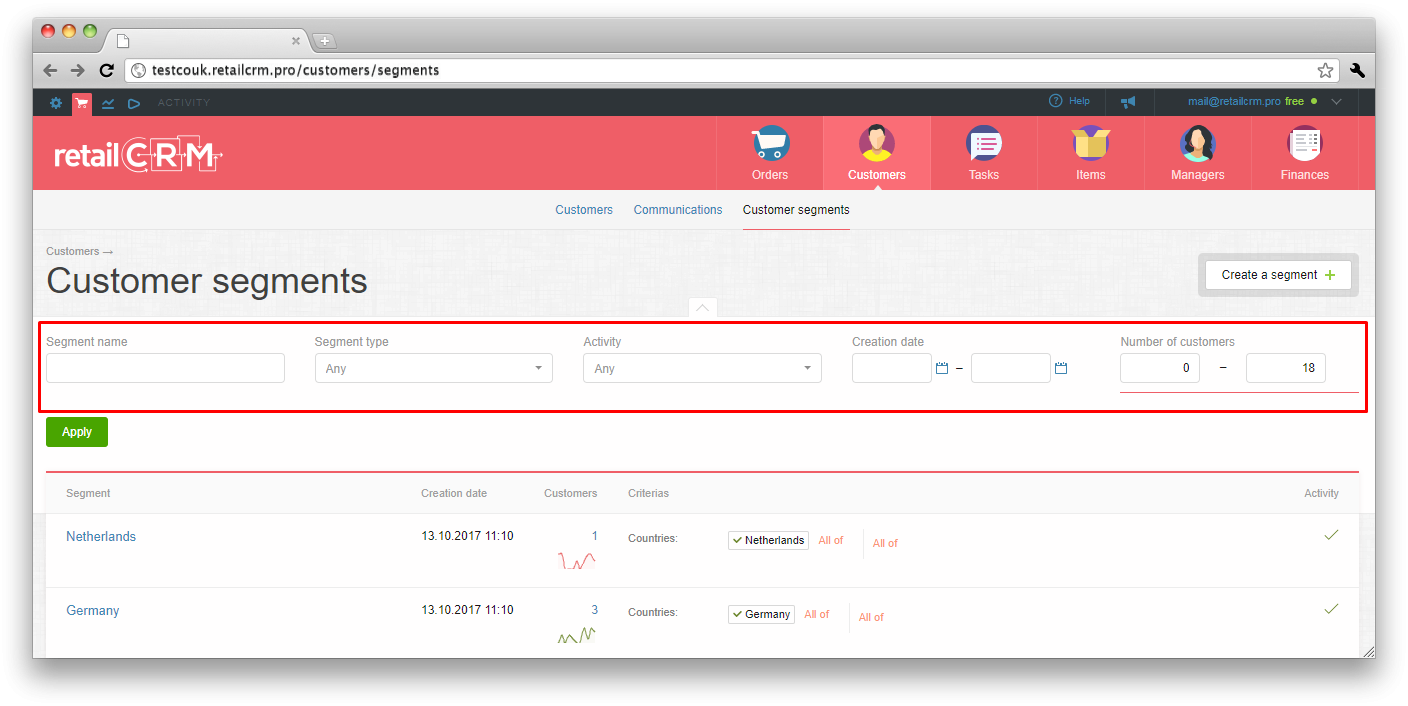
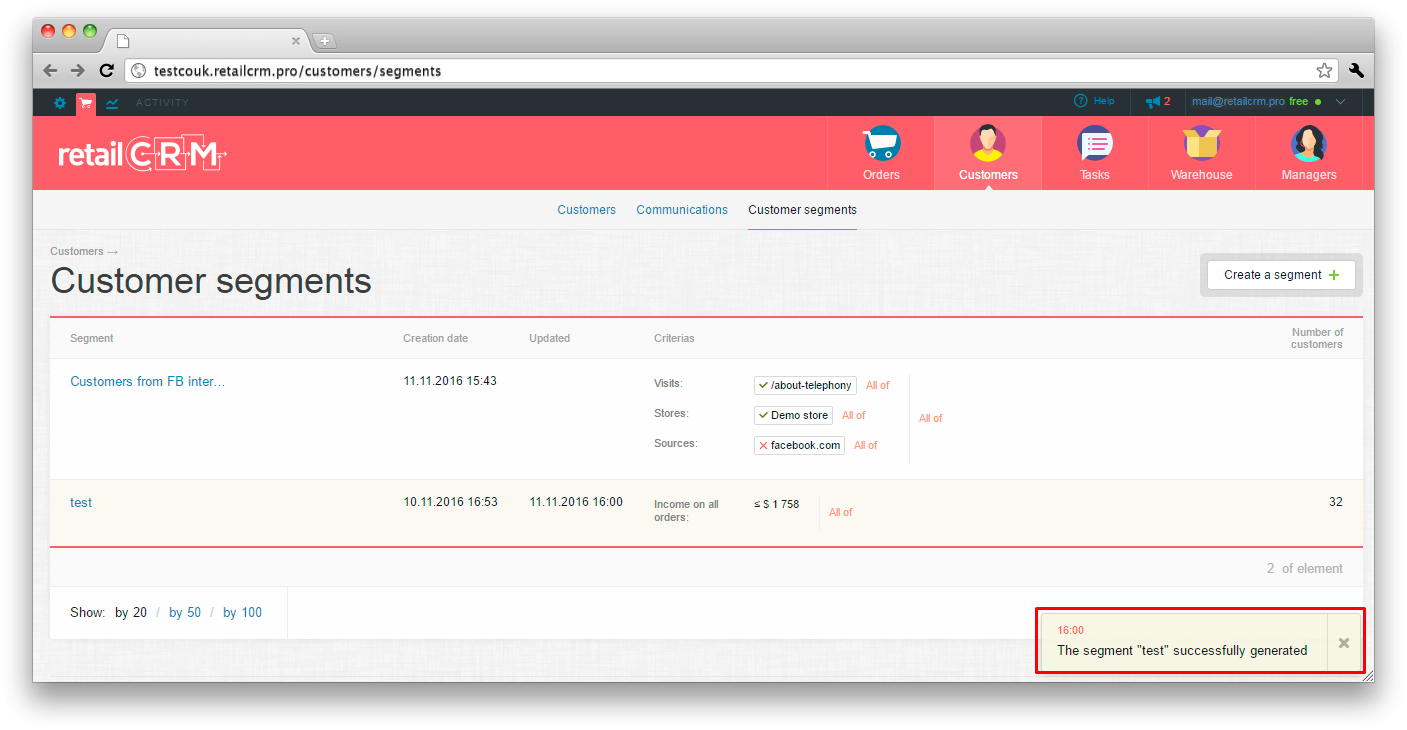
For viewing the segment list you should go to Activity > Customers > Customer segments.
For quick working with many segments, it is convenient to apply filter by different parameters. For example, you can filter segments by customer quantity or by creation date.
There are created segments with the following parameters:
Note: inactive segments are not being recalculated.
The segment dynamics, visualized as a graph, is being fixed in "Customers" column for dynamic segments.
There is also a link with current quantity of customers, which goes to customer list filtered by segment.
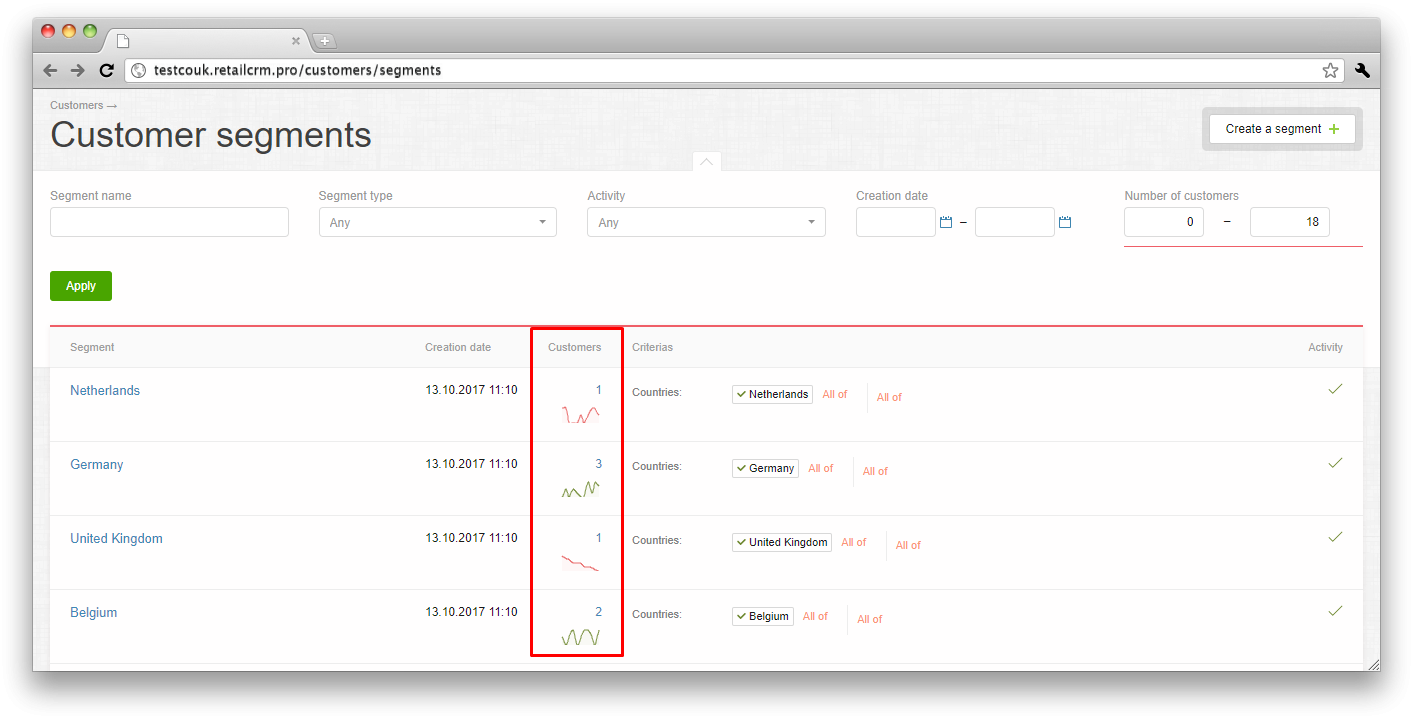
Note: inactive segments are not being recalculated, dynamics graph is gray colored for these segments.
There is a lock icon in static segments, means that the segment is blocked for recalculation.

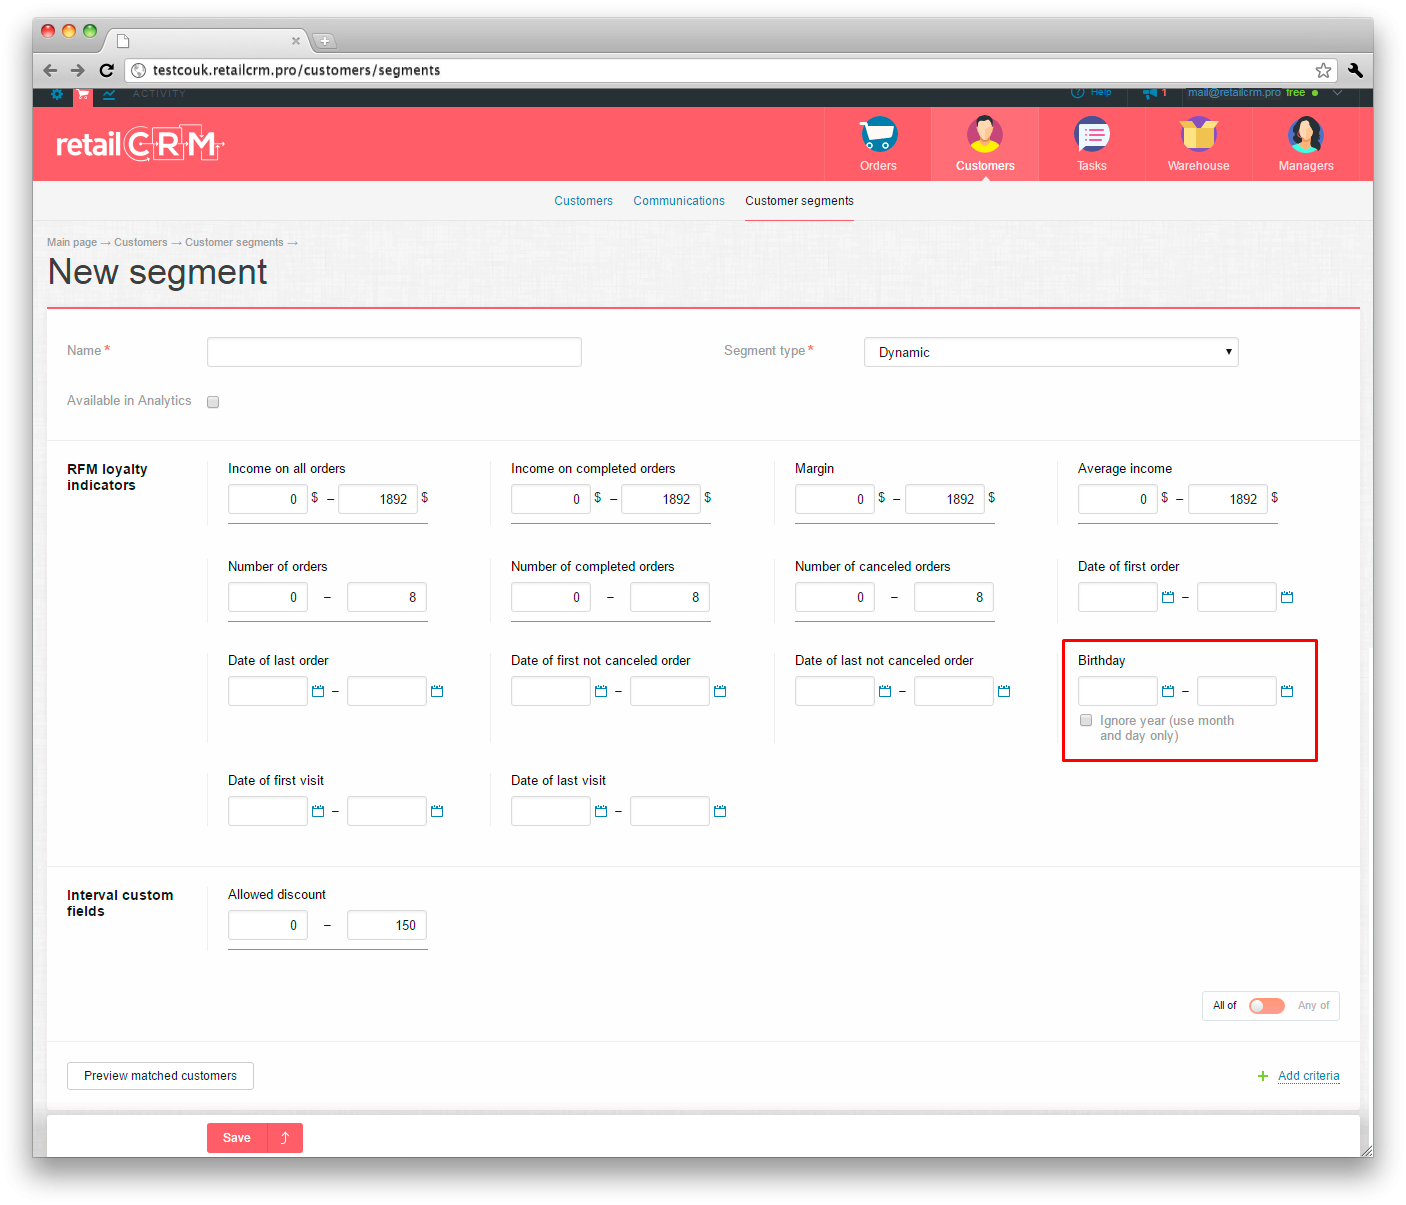
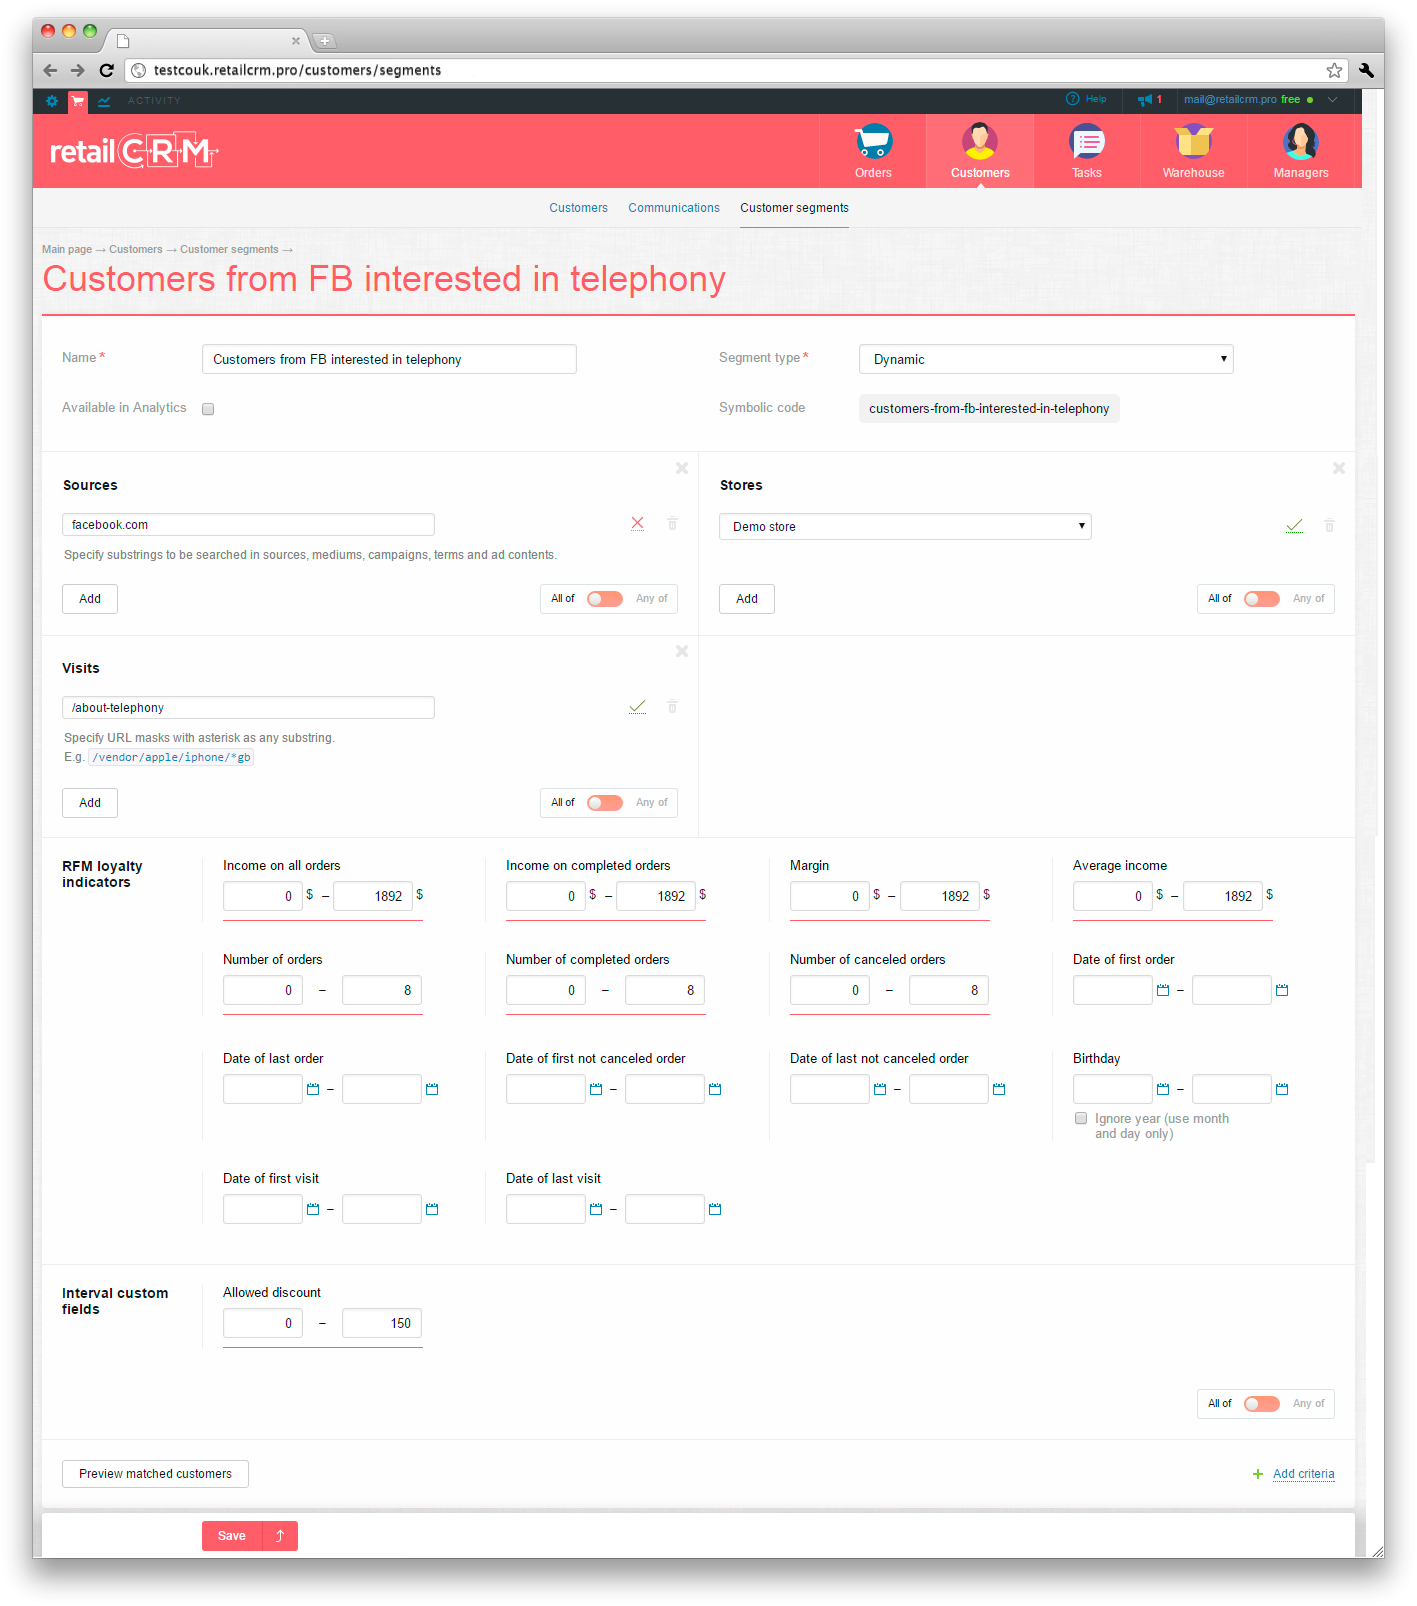
For creation of segment you should click the appropriate button.
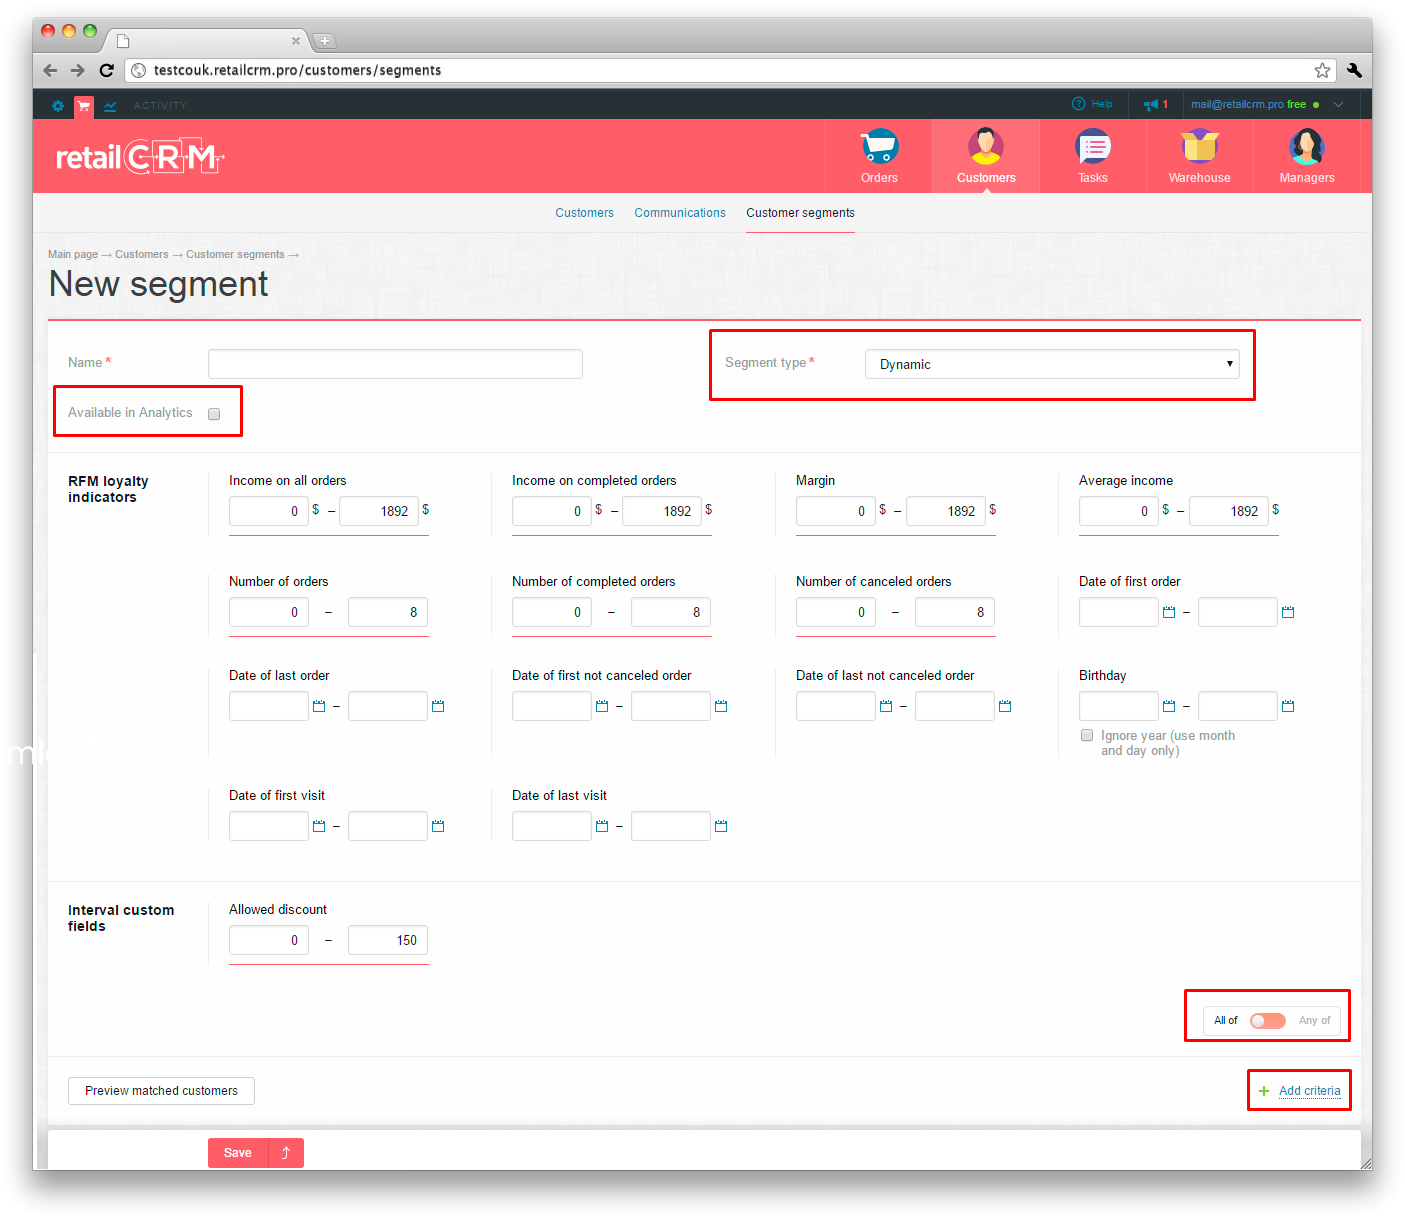
If to select the «Static» segment type then customer filtration for this segment will be done once. I.e. if customer got in the segment once, he will stay there even if his data will be changed and will not match this segment any more.
If to select the «Dynamic» segment type then customer filtration for this segment will be done once a day by all customers. And customers can get in or get out of the segment, if their parameters will be changed regarding segment filters.
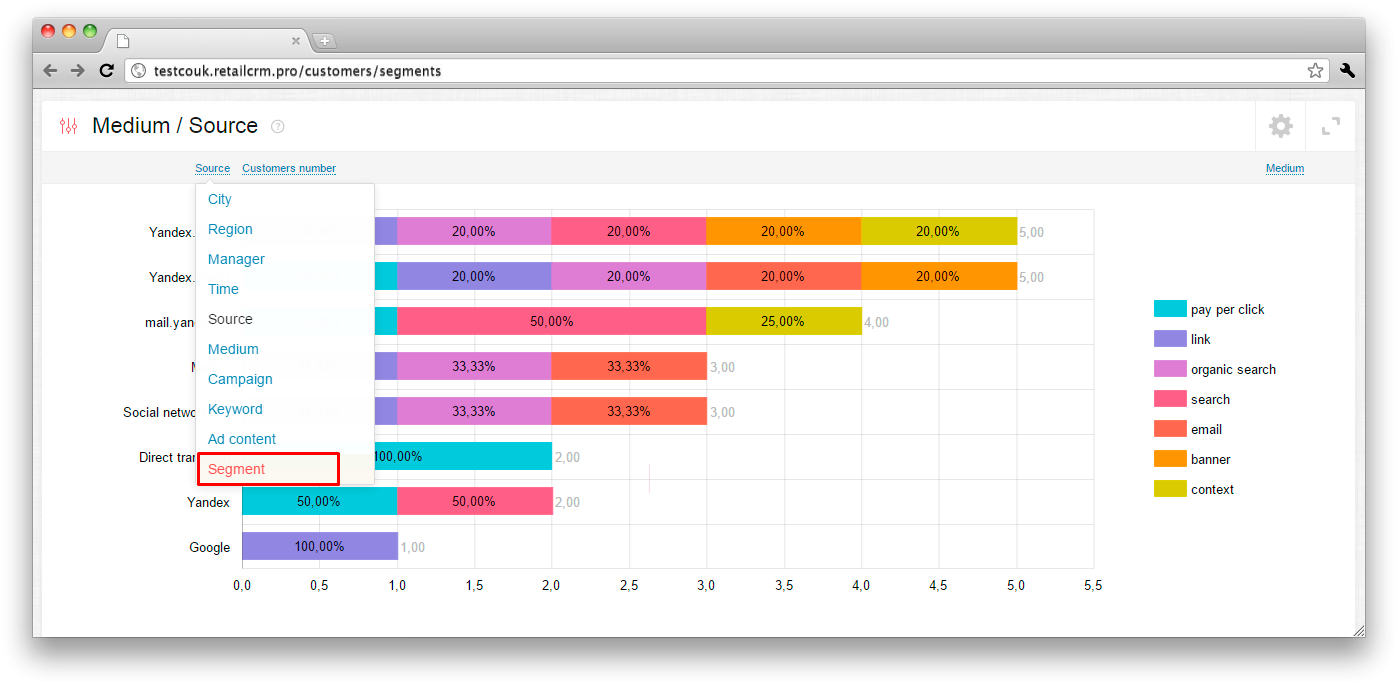
«Available in Analytics» tick means that after segment creation the «Segment» axis will be available in analytic widgets in Analytics section.
«RFM loyalty indicators» contain parameters displaying customer solvency and recency of his orders:
In «Interval custom fields» there are fields, which were created in Administration > Settings > Custom fields section and have date, integer or number type. For example, it is «Age» and «Birthday».
There is also a possibility to filter by date of birth and custom fields without considering the year in segments.
For this purpose you should set the «Ignore year» tick.
Note: if to specify date interval 25.07-28.09 in filter, there will be dates from July 25 to September 28 any year, if to specify date interval 2.12-3.01, there will be dates from December 2 to December 31 and from January 1 to January 3.
«All of / Any of» switch sets parameter checking conditions: all at the same time or one parameter is enough.
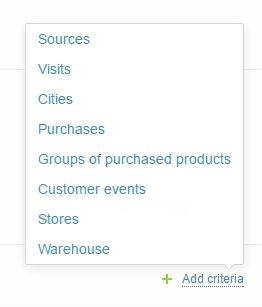
You can add at least one filter of the following: Sources, Visits, Cities, Purchases (items), Stores etc. There are also custom fields, created earlier.
Notes:
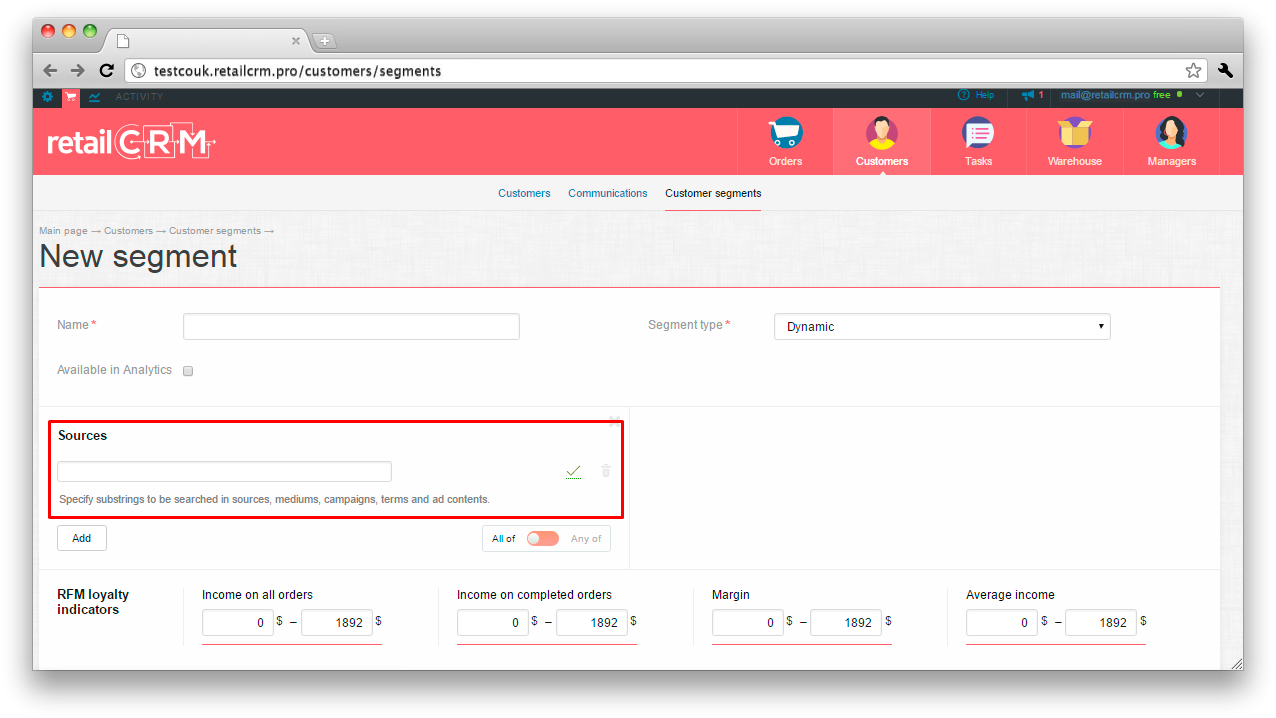
For example, you have chosen «Source» filter.
For each filter you can specify any number of values.
Icon  means that this parameter is included in filtration, and icon
  means the absence of this parameter in filtration.
There is «Sources» filter on the screenshot. Filters «Visits», «Cities» should be filled the same, by hand.
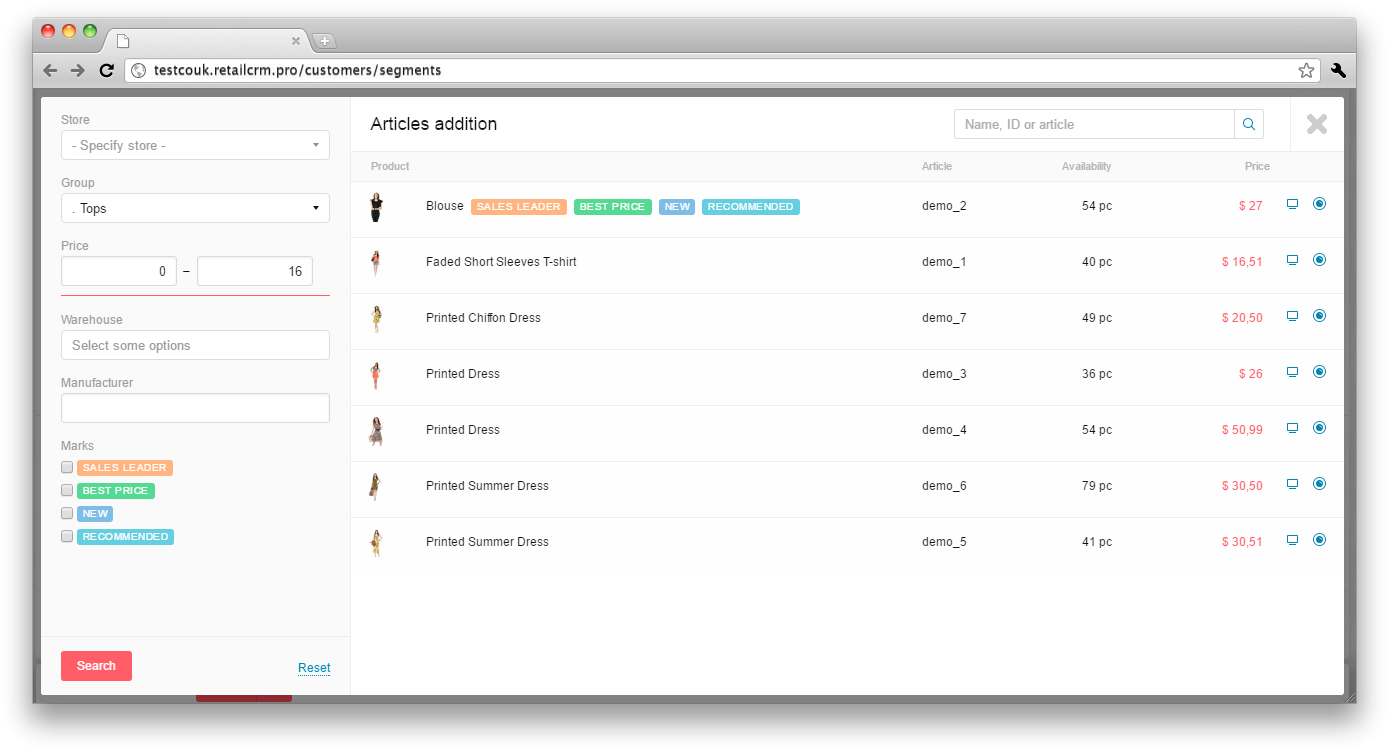
Filter by items and item groups should be specified through selection from item list or item groups list:

There is example of ready segment on the screenshot. Here you can see filters by sources, stores and visits.
Segment formation is performed in background mode. Static segments are enqueued to generating immediately after their creation or editing. Dynamic segments are being formed and updated once a day.
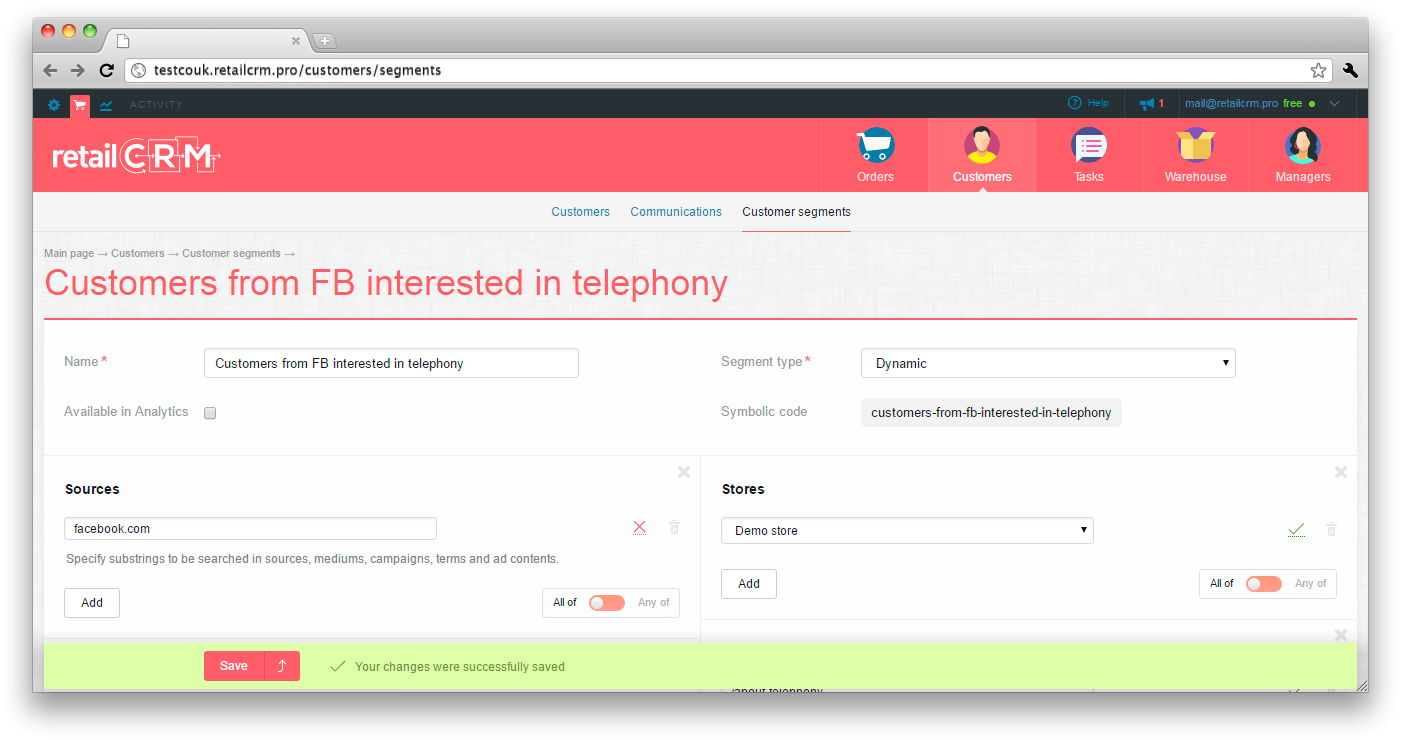
When forming the segment, you can see entry «In queue».

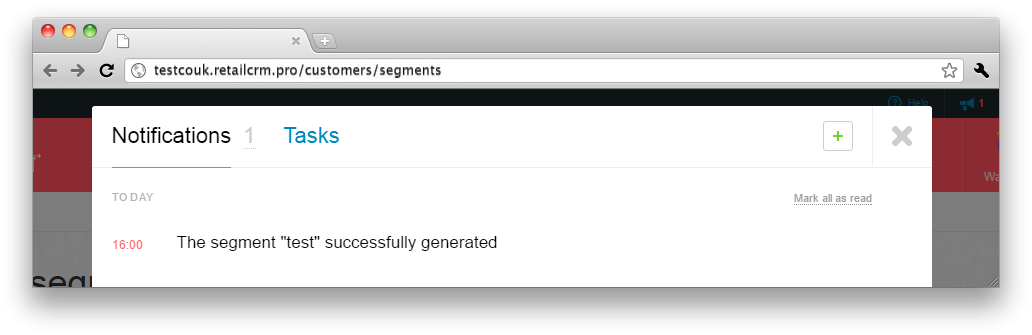
After finishing of segment formation, there will be a notification in pop-up window at the right bottom and also via email.
Pay attention, that sending of notifications and emails depends on user settings, that are in Administration > Users.
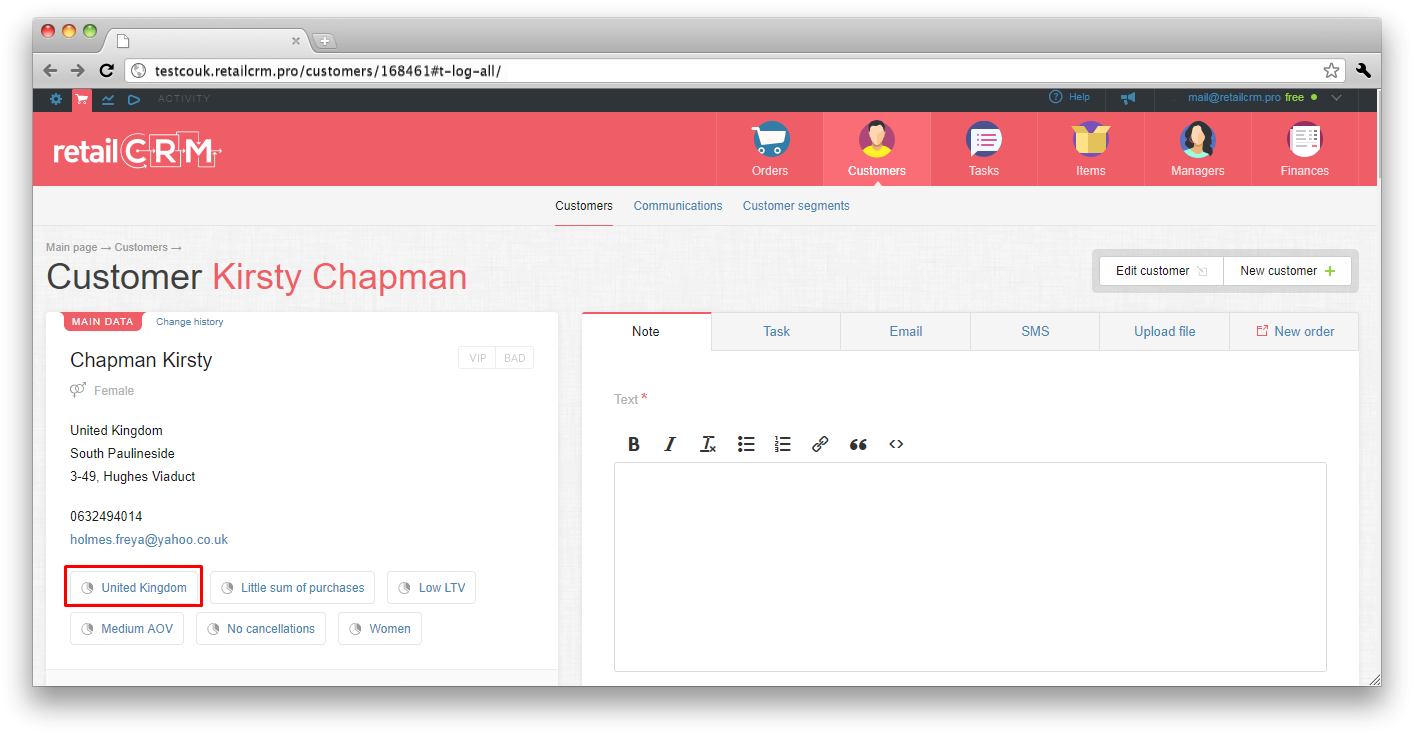
Fact of customer getting into or out the segment is being fixed in customer history. It allows to use these events in triggers on change of customer information.
Ready segments can be used by the following ways.
There is a possibility of e-mail/SMS sending to customers in segment after formation of segment.
For this purpose it is necessary to click the "Actions" button at the top left corner.
Choose necessary action in drop-down menu.

You can read more details on segment mailing in appropriate section.
In trigger you can set email or SMS sending when adding the customer to segment. You can read technical information on segment trigger settings here.
Example:
There can be situations when manager should communicate with certain customers, who made purchases earlier. For this purpose you can use segmentation together with trigger. You can set trigger so that it will create task or notification for responsible manager of customer when adding this customer to the segment.

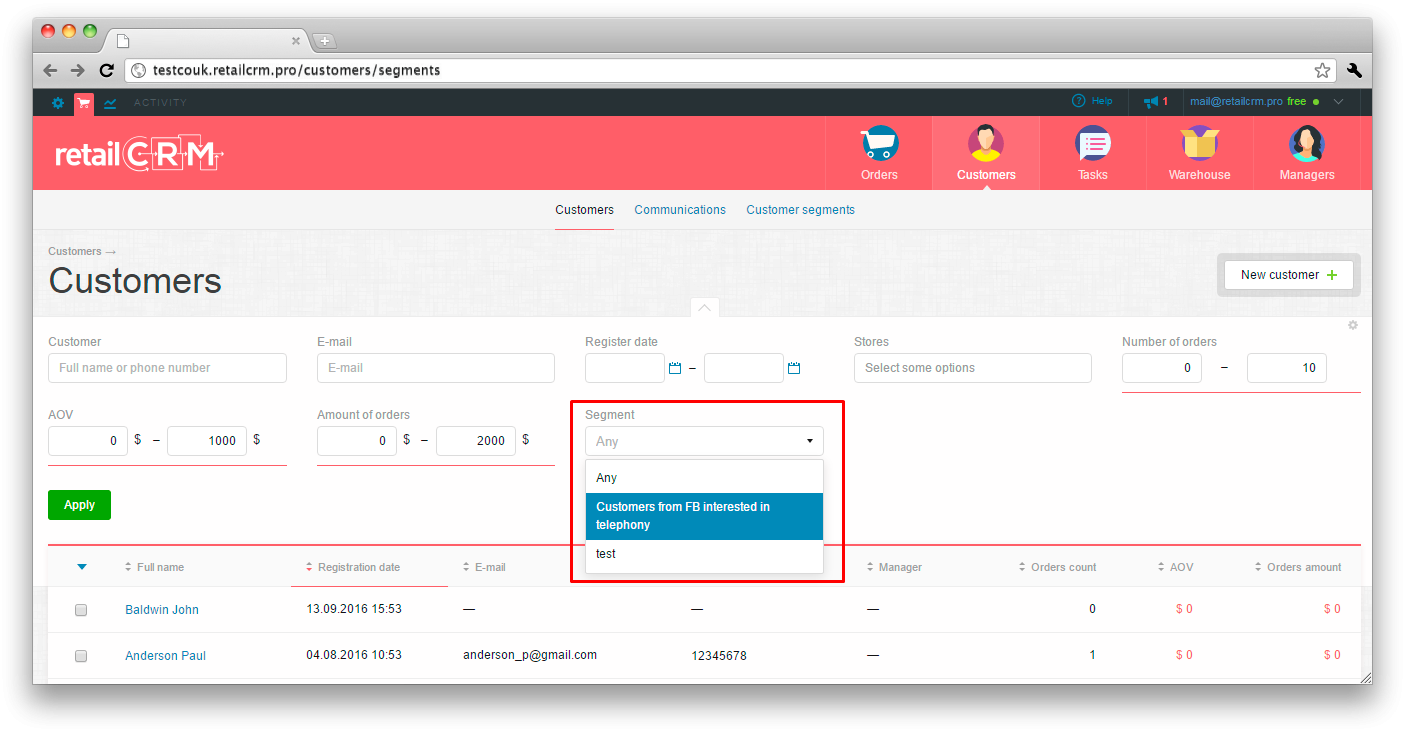
You can filter the customers by segments and then export filtered lists to csv or another format convenient to you for mailing or analysis of exported data.

Example:
Besides, filtration of customer list by segment is available also in API.